What you will need:
2 white curtain panels (I got mine from Target, they were cotton/polyester blend but kind of have a thicker canvas feel)
1 gallon of paint - I started with a quart and ended up going back for another quart
small roller sponge (I never used that larger roller sponge pictured)
painters tape - get 2" the wider the tape the better
drop cloth for painting
tape measure
pencil
yard stick/ruler
iron/ironing board (optional)
Total Cost: roughly $75
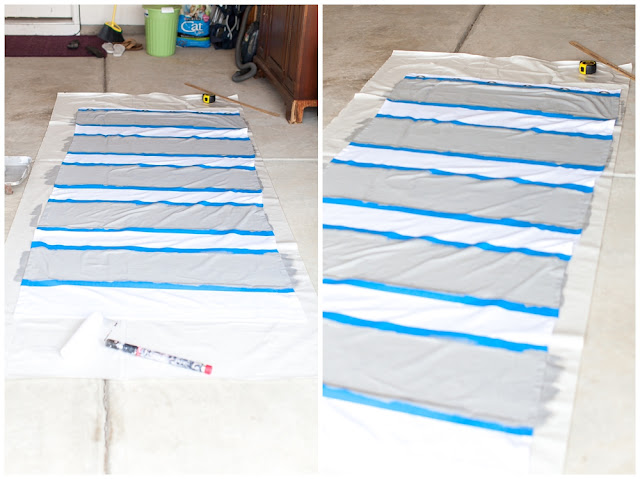
We ironed the curtains before we measured them and I highly suggest you do this. It really helped while we were tugging the fabric trying to make the measurements exact. Plus, wrinkled curtains look messy. :)Find a big area to measure and paint. We set up shop in the garage and then moved the curtains out to the driveway so they would dry in the sun quickly. These curtains were 95" but after the grommet inseam they measured about 90 inches. We made it easy and did (10) 9 inch stripes. We used a yardstick and measured 9 inches down and penciled a little dot, and then another 9 inches down and penciled another dot and so on. We did that on both the left and right side. Then, we sat across from each other and lined the tape up on the two dots. I read some blogs who penciled a line across the curtain before they taped but we didn't do that. I didn't want to draw a line across the curtains in case we messed up, plus this method worked great for us. We checked ourselves with a ruler to make sure the widths were fairly even. We eyeballed it and it worked just fine.
Figure out the order you're going to do the stripes. We started with a painted stripe, so then we taped accordingly. Remember when you're measuring and taping the white stripes will appear smaller. You're taping above and below the lines of the painted stripes.
We did two coats of paint. You could really see through the curtains on the first layer of paint so it was totally necessary to do a second coat. This might depend on what type of paint you use and the material of the curtains. Also, we took the tape off while it was still wet and it gave us really clean lines. Whew!
The final product!
I just love them! Y'all go ahead and try them and share them with me!


